So you've discovered Online Logo Maker, a simple yet powerful tool that can help you quickly create logos for your endeavor, but find it a bit daunting? In this case this tutorial is here to help you out.
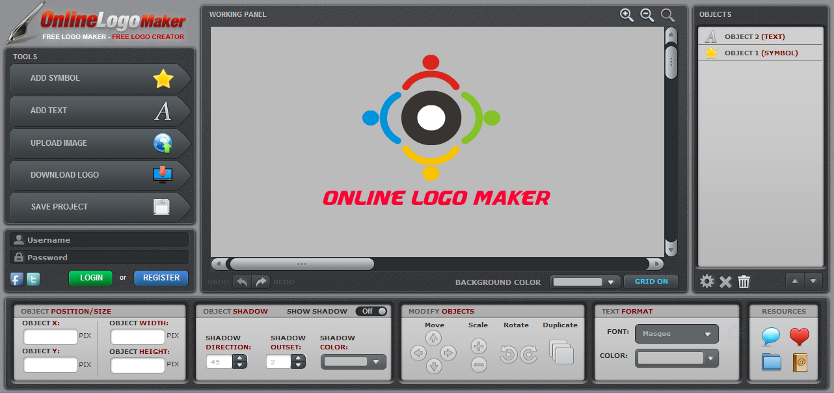
First of all let's take a look at the Main Window:
It has four important areas as outlined:
- The Working Panel
- The Toolbar
- The Objects Panel
- The Properties Bar
Let's take a look at each:
- The Working Panel is your main work space, it's here that your logo will take life,
as you insert and manipulate pictures and text.
- The Toolbar contains controls for inserting different kinds of objects (more on that later), saving your work,
downloading your logo and other options as well.
- The Objects Panel organizes the elements of your logo, letting you sort, rename and delete them as necessary.
- The Properties Bar has all sorts of useful options for manipulating your objects, you'll be working with it a lot.
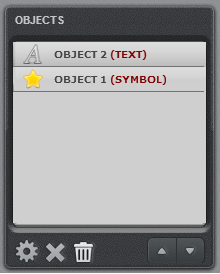
We'll now walk through the main features of Online Logo Maker together: in the beginning you'll see a couple of objects already there in the object list:
Click

at the bottom, then click
OK to get rid of them. You can also select just one object, then click

to remove just that.
From here you can also use the two arrow buttons to sort objects on the list up and down, and rename them with the cogwheel button

on the left.
Note: moving an object above another on the list, will also put it on top of the other in the Working Panel. This is useful to control how elements of your logo overlap.
Now it's time to add some objects to your logo. Objects come in three flavors: Symbols, Text, and Images. They can be added with these three buttons on the Toolbar:
- A Symbol is one of the more than a thousand pre-made pictures that come with Online Logo Maker. You can change a symbol's color, size, rotation, etc.
- Text is just that – text. You add it with the second button. To edit the writing just double click the text and type, then click outside to finish. The color and font can be changed from the Properties Bar below when the text is selected.
- An Image is a picture from your own computer that you upload and add to the Working Panel. Just click the upload image button and select any image file from your computer.
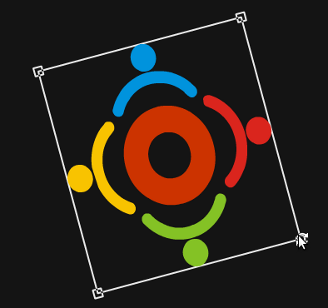
Now let's add a symbol, to check out a few things that we can do with all objects:
When an object of any kind is selected, it has a black square around with some controls.
You can click and drag on any three of the square corners to resize the object,
while doing the same with the round corner will rotate it:
Finally, clicking and dragging within the object will move it around.
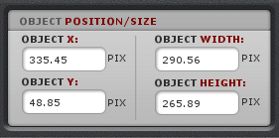
Once you've placed and sized an object using the mouse you can also refine these settings with the Properties Bar, either by setting the number values for size and position (distance from top left corner of workspace) directly, or by using the blue arrows to fine-tune them.
Another thing you can do from the Properties Bar is to add shadow to the objects, as shown here:
It's most often used with text but any object can be given a drop shadow. To add one just check the Show Shadow box, then set the angle of the shadow direction (0-360) and the size of the shadow, as well as the colour.
Note: You can use this button:

- to quickly duplicate any selected object.
Finishing the Logo:
Once you're done with your design you can download your logo using this button:

- which downloads the logo directly as an image with transparent background (PNG format). Your logo is now ready to be used.